
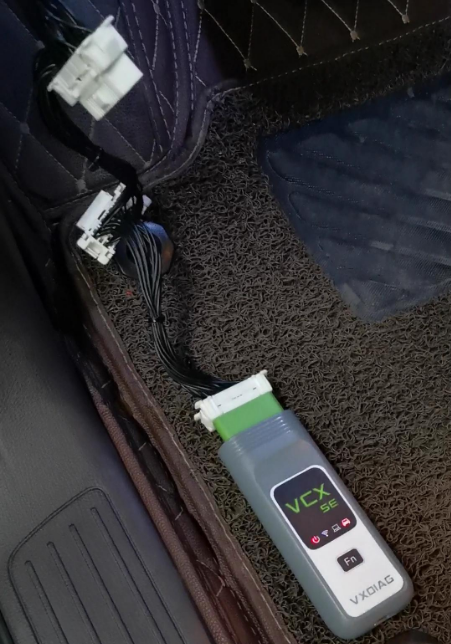
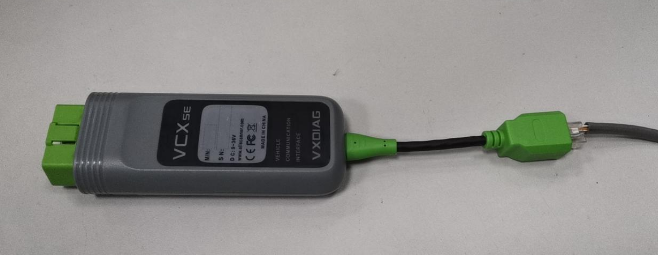
VXDIAG has launched “DoNet authorization“ (free for 4 months now and enjoy lifetime). After VCX SE for DoIP Benz and VCX Multi Box users obtain DoNet authorization, they can enjoy remote diagnosis and online programming / coding service from VXDIAG technicians. Before enjoying assistance, the user are required to plug the device onto the car, configure the network connection (through phone Hotspot), and provide the serial number to the technician.
As known: After October, 2020, Mercedes Benz account won’t allow to login the unverified computer to do online programming. Then VXDIAG VCX DoNet super remote diagnosis / programming service will relieve you of this confusion.
Part 1. Set Personal Information, Configure Serial Number and Network Connection.
Part 2. The technician login the official account to do remote diagnosis and online programming / coding.
Part 3. Set Personal Information, Save Serial Number and Network Connection.
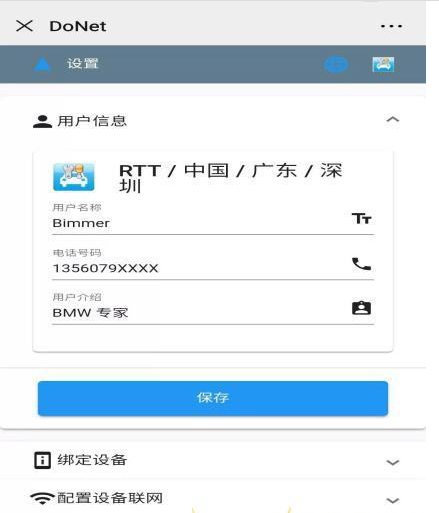
1. Input user information ( be required for the first use ).
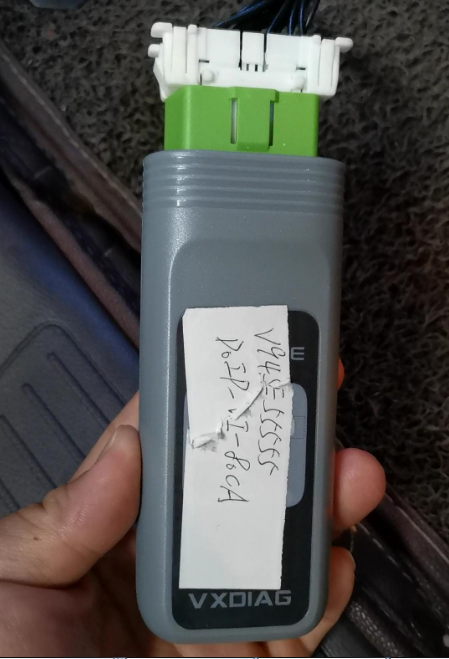
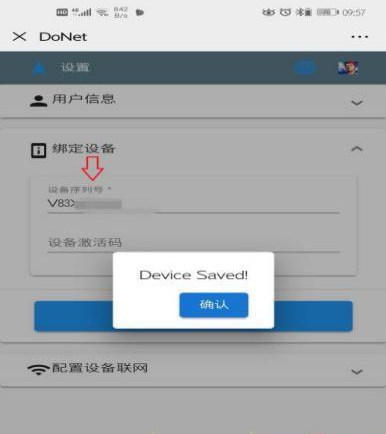
2. Input device serial number and click “save” (be required for the first use).
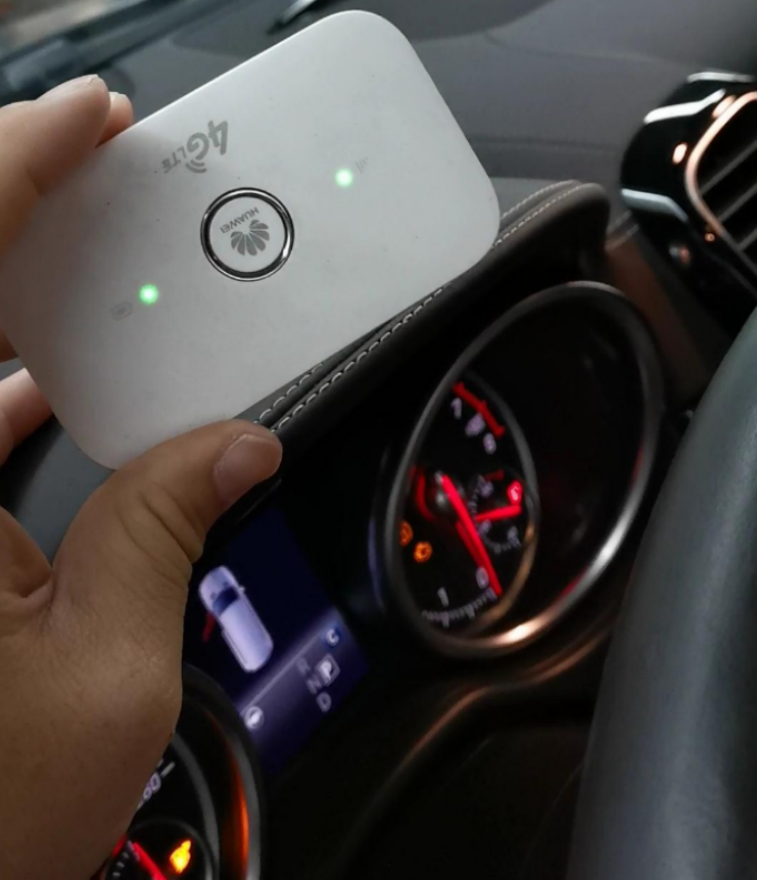
3. Configure the Network connection: Phone Hotspot is easiest method.
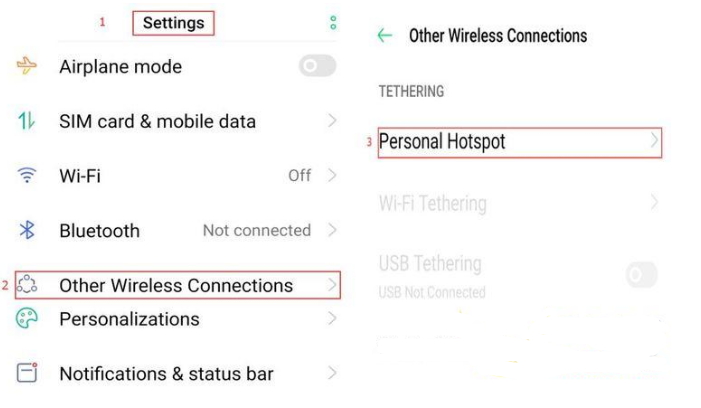
1). Enter the phone “Settings”
2). Select “Other Wireless Connections”
3). Select “Personal Hotspot”
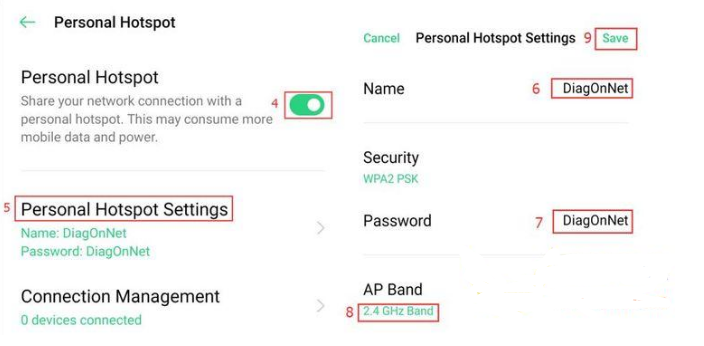
4). Turn on the “Personal Hotspot” switch
5). Select “Personal Hotspot Settings”
6). Set name and password as “DiagOnNet” (pay attention to uppercase and lowercase!)
7). Choose “2.4GHz Band”, not 5G network
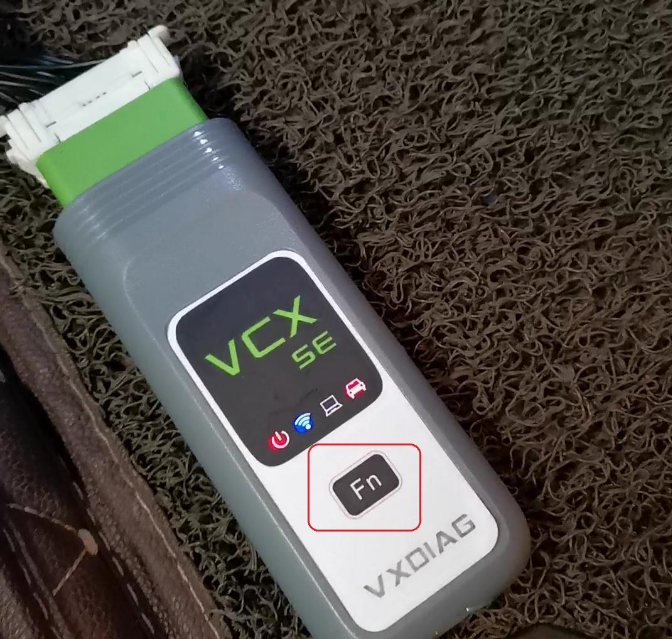
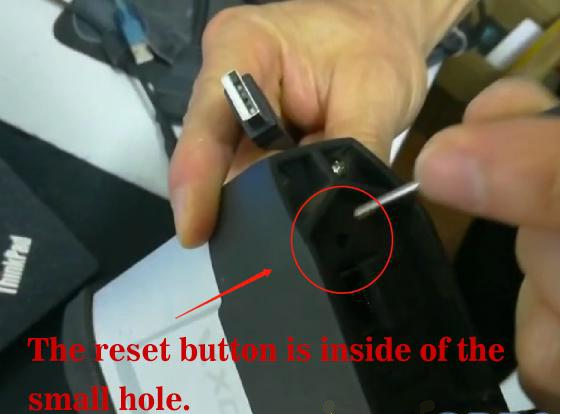
4. To reset the device
Press the “Fn” button of the VCX SE Benz DoIP device ( for VXDIAG VCX box, The reset button is inside of the small hole) for 2 seconds to enter the network configuration mode.
Wait for about 30 seconds until you hear the beep of the device buzzer, then the network configuration is done.
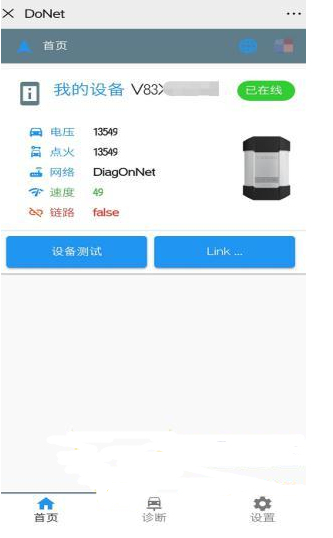
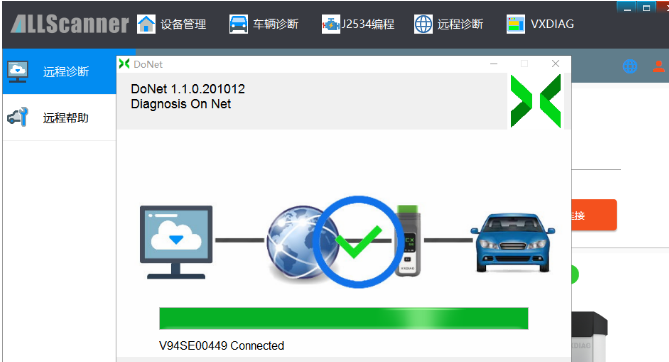
5. After the device is connected to the Internet, the home page will display device information (as shown in the image).
The device is connected to the network.
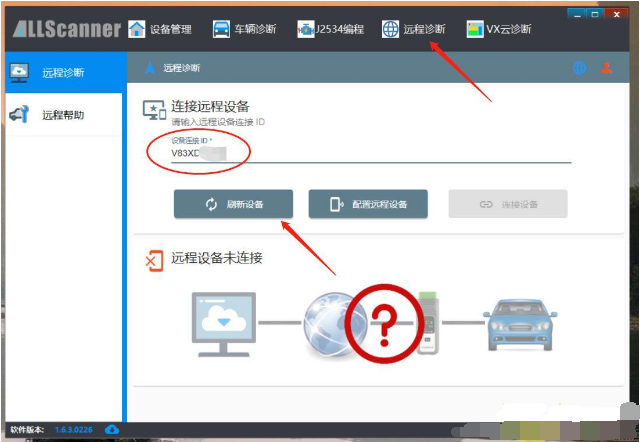
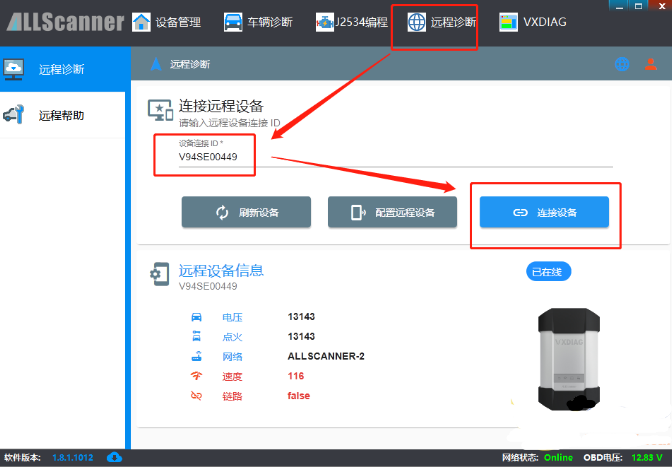
6. Open the latest version of “VX MANAGER” on the diagnostic computer
Enter “the remote diagnosis “menu, enter the device serial number, and click on “Refresh Device“.
After the device information appears, click on “Connect Device“.
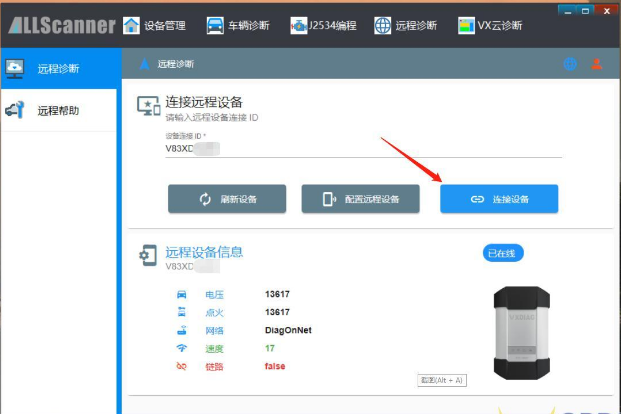
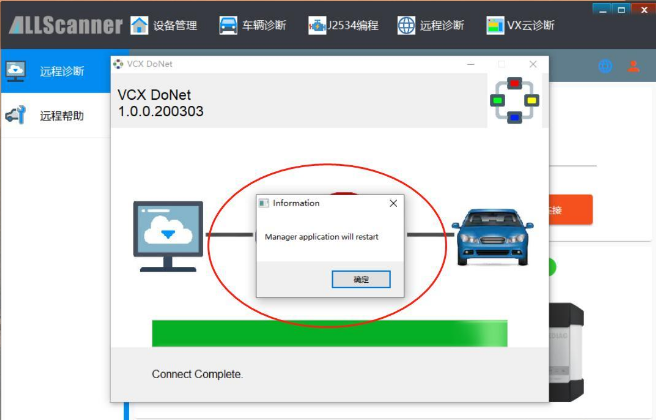
7. After the connection is successful, you will be prompted to restart the “VX MANAGER”, then there will be device information.
It means that the device has been connected to this computer and you can start to diagnose and test the car.

Part 2. The technician login the official account to do remote diagnosis and online programming / coding.
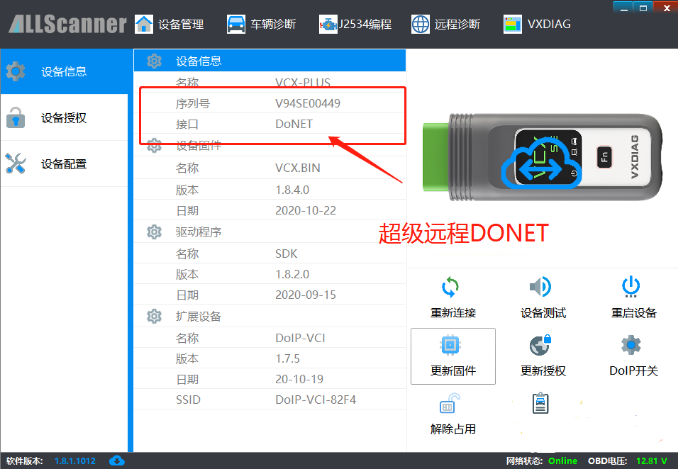
1.Plug VCX SE (with DoNet authorized firstly) onto the car, configure the internet connection (view the first part)
2. Provide the VXDIAG technician with the device serial number. The technician will enter “VX MANNAGER” to connect the VCX device in your car.
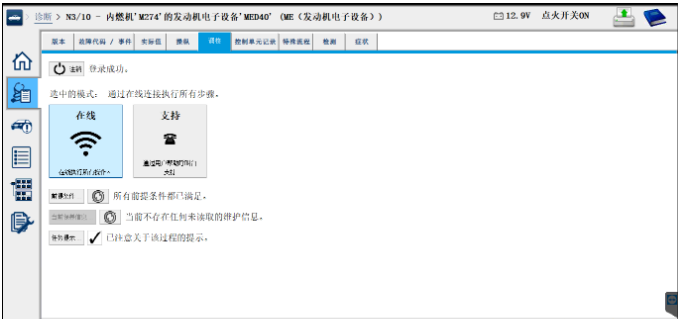
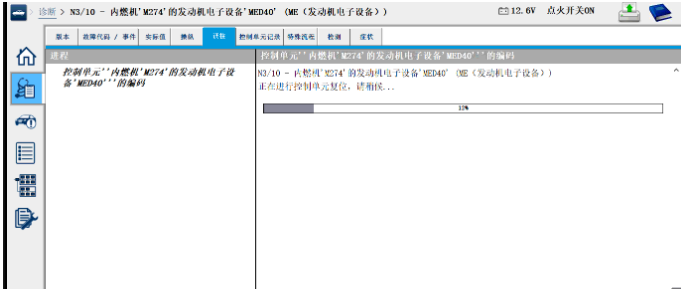
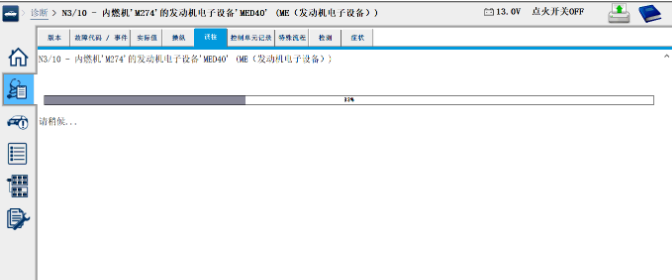
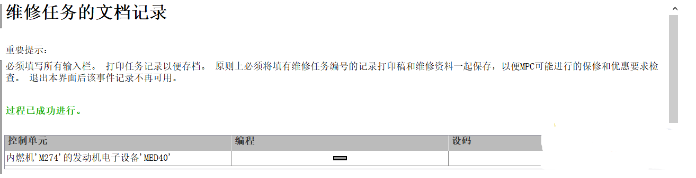
3. Once the VCX device is successfully connected, the technician will enter Xentry diagnostic software to login the official account to program online. For example, the picture below shows the C205DME online coding.
Notes:
Please make sure the network is stable, the VXDIAG VCX device (Benz DoIP VCX SE or VCX Multi tool) should be connected to the network cable to configure the internet as much as possible. So that the remote diagnosis / online programming and coding job will be satisfy until end.

Enjoy, we done!