Introduction:
Installing Cummins Inline 7 is the first crucial step towards efficient engine diagnostics and programming. In this blog post, we will provide a detailed step-by-step guide on how to install Cummins Inline 7, ensuring a successful setup process. By following these instructions, you’ll be ready to harness the powerful capabilities of Cummins Inline 7 for your engine.
Step-by-Step Guide: How to Install Cummins Inline 7
Step 1: Ensure System Compatibility
Before installation, it is essential to verify that your computer meets the system requirements as specified in the Cummins Inline 7 user manual. Ensure compatibility with the operating system, available memory, processor speed, and other necessary specifications.
Step 2: Obtain the Installation Package
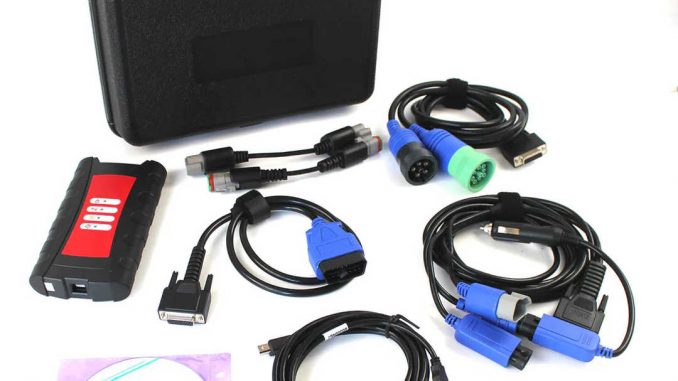
Acquire the Cummins Inline 7 installation package from an authorized distributor or dealer. This package typically includes the Cummins Inline 7 data link adapter and the required software.
Step 3: Connect the Data Link Adapter
Connect one end of the provided USB cable to the Cummins Inline 7 data link adapter and the other end to an available USB port on your computer. Ensure a secure connection.
Step 4: Install the Software
Insert the installation disc into your computer’s CD/DVD drive or run the downloaded software file. Follow the on-screen instructions to initiate the installation process. Select the appropriate options as prompted, such as the installation location and additional components if applicable.
Step 5: Configure Settings
Once the software installation is complete, launch the Cummins Inline 7 application. Configure settings according to your preferences, including language selection and communication interface options. Refer to the user manual for specific configuration guidance.
Step 6: Connect to the Engine
Locate the diagnostic port on your Cummins engine. Connect the Cummins Inline 7 data link adapter securely to the engine’s diagnostic port. If needed, refer to the engine’s documentation or service manual for the precise location.
Use the software interface to access engine parameters, read fault codes, adjust settings, calibrate systems, and perform any necessary operations specific to your engine model.
Conclusion:
By following this step-by-step guide, you can successfully install Cummins Inline 7 and unlock its powerful features for engine diagnostics and programming. Remember to consult the user manual for detailed instructions and seek support from authorized Cummins channels when needed. Enjoy the enhanced capabilities of Cummins Inline 7 as you efficiently diagnose and maintain your engine with confidence.